It was back in August 2012 that I bought myself a Macbook Pro. It’s still going just as strong today, now with the latest version of OS X (although battery lift is not what it was). It wasn’t a standard build as I opted for a 120GB SSD, instead of the usual mechanical drive. As I wasn’t storing music, videos or photos on it I felt that 120GB of storage would be plenty, and the SSD would add extra resilience.
However, although storage of media is still not something I do on it, I do make extensive use of iMovie. And it positively eats drive storage. Thankfully, since, SSD prices have dropped, so it’s time for a replacement.
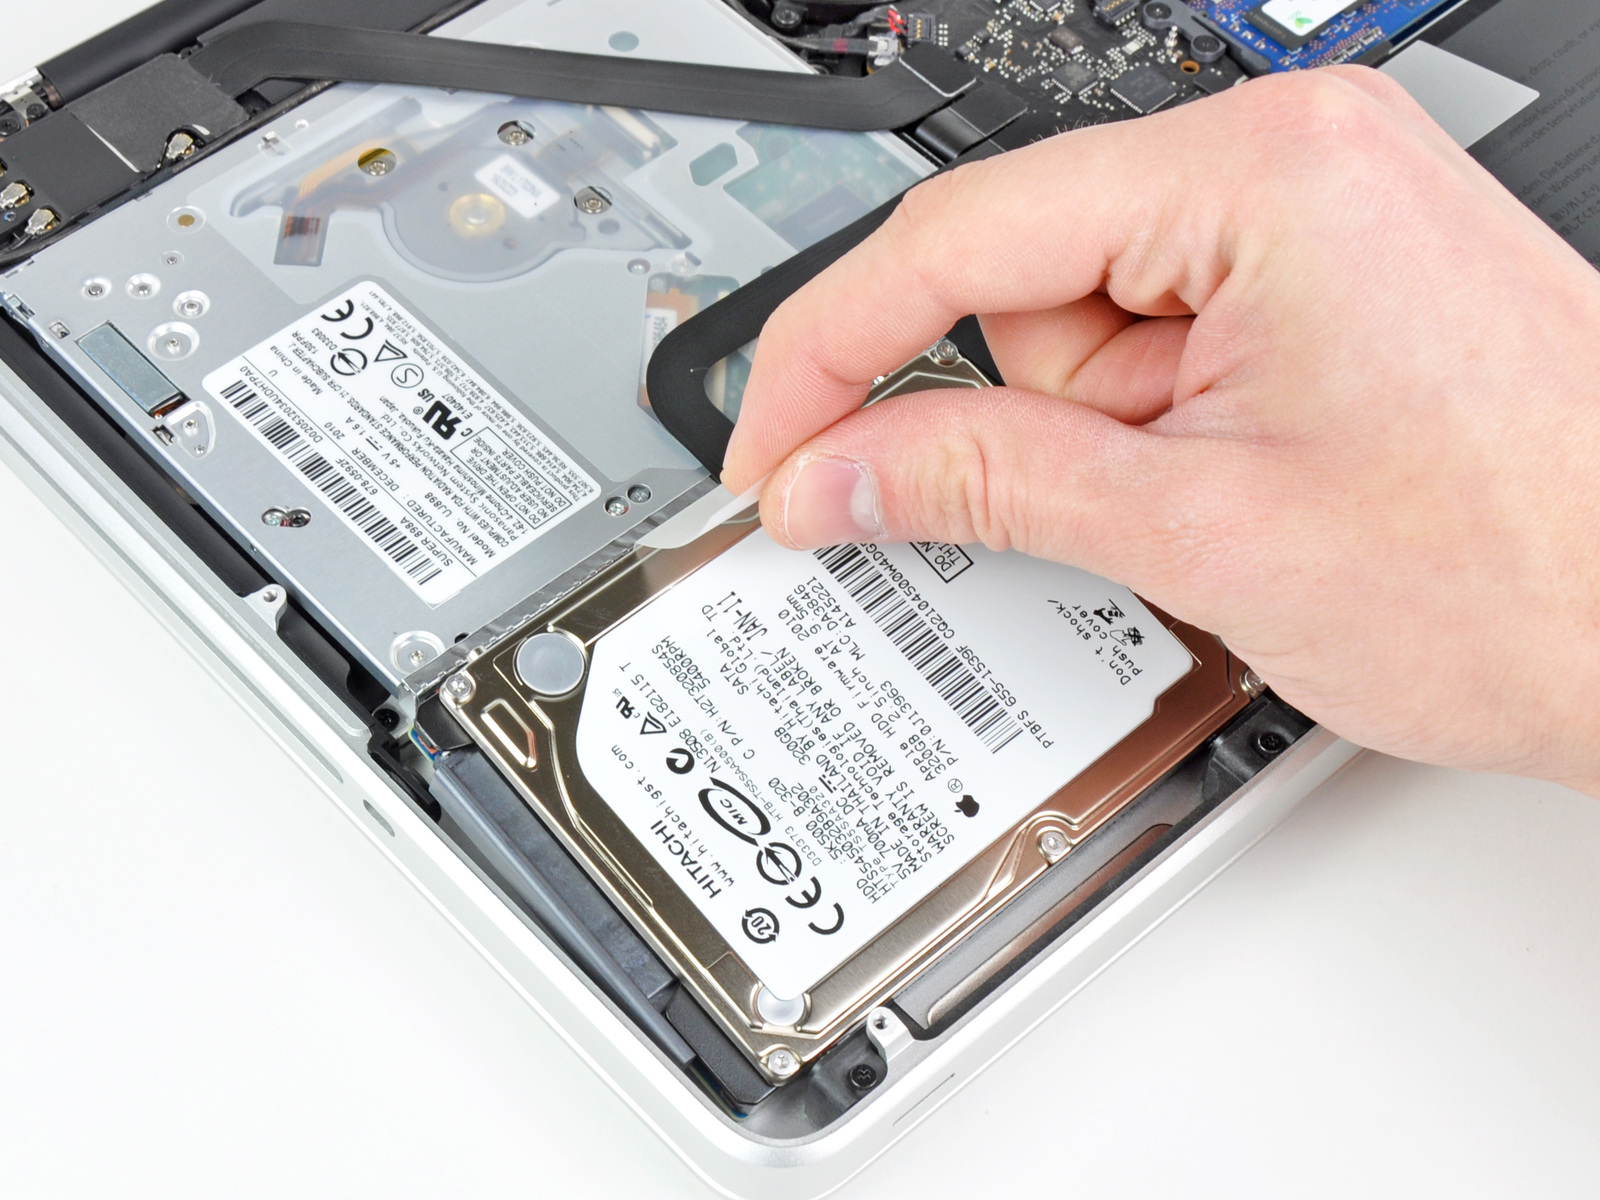
Where’s the Drive?
With lots of “teardowns” available for the Macbook, I thought it wouldn’t be too hard to work out how the drive can be replaced. If you have a mechanical drive then it’s relatively easy to find the answer. Sadly, for me, it wasn’t that easy as I couldn’t find something specifically for my model that already has an SSD equipped.
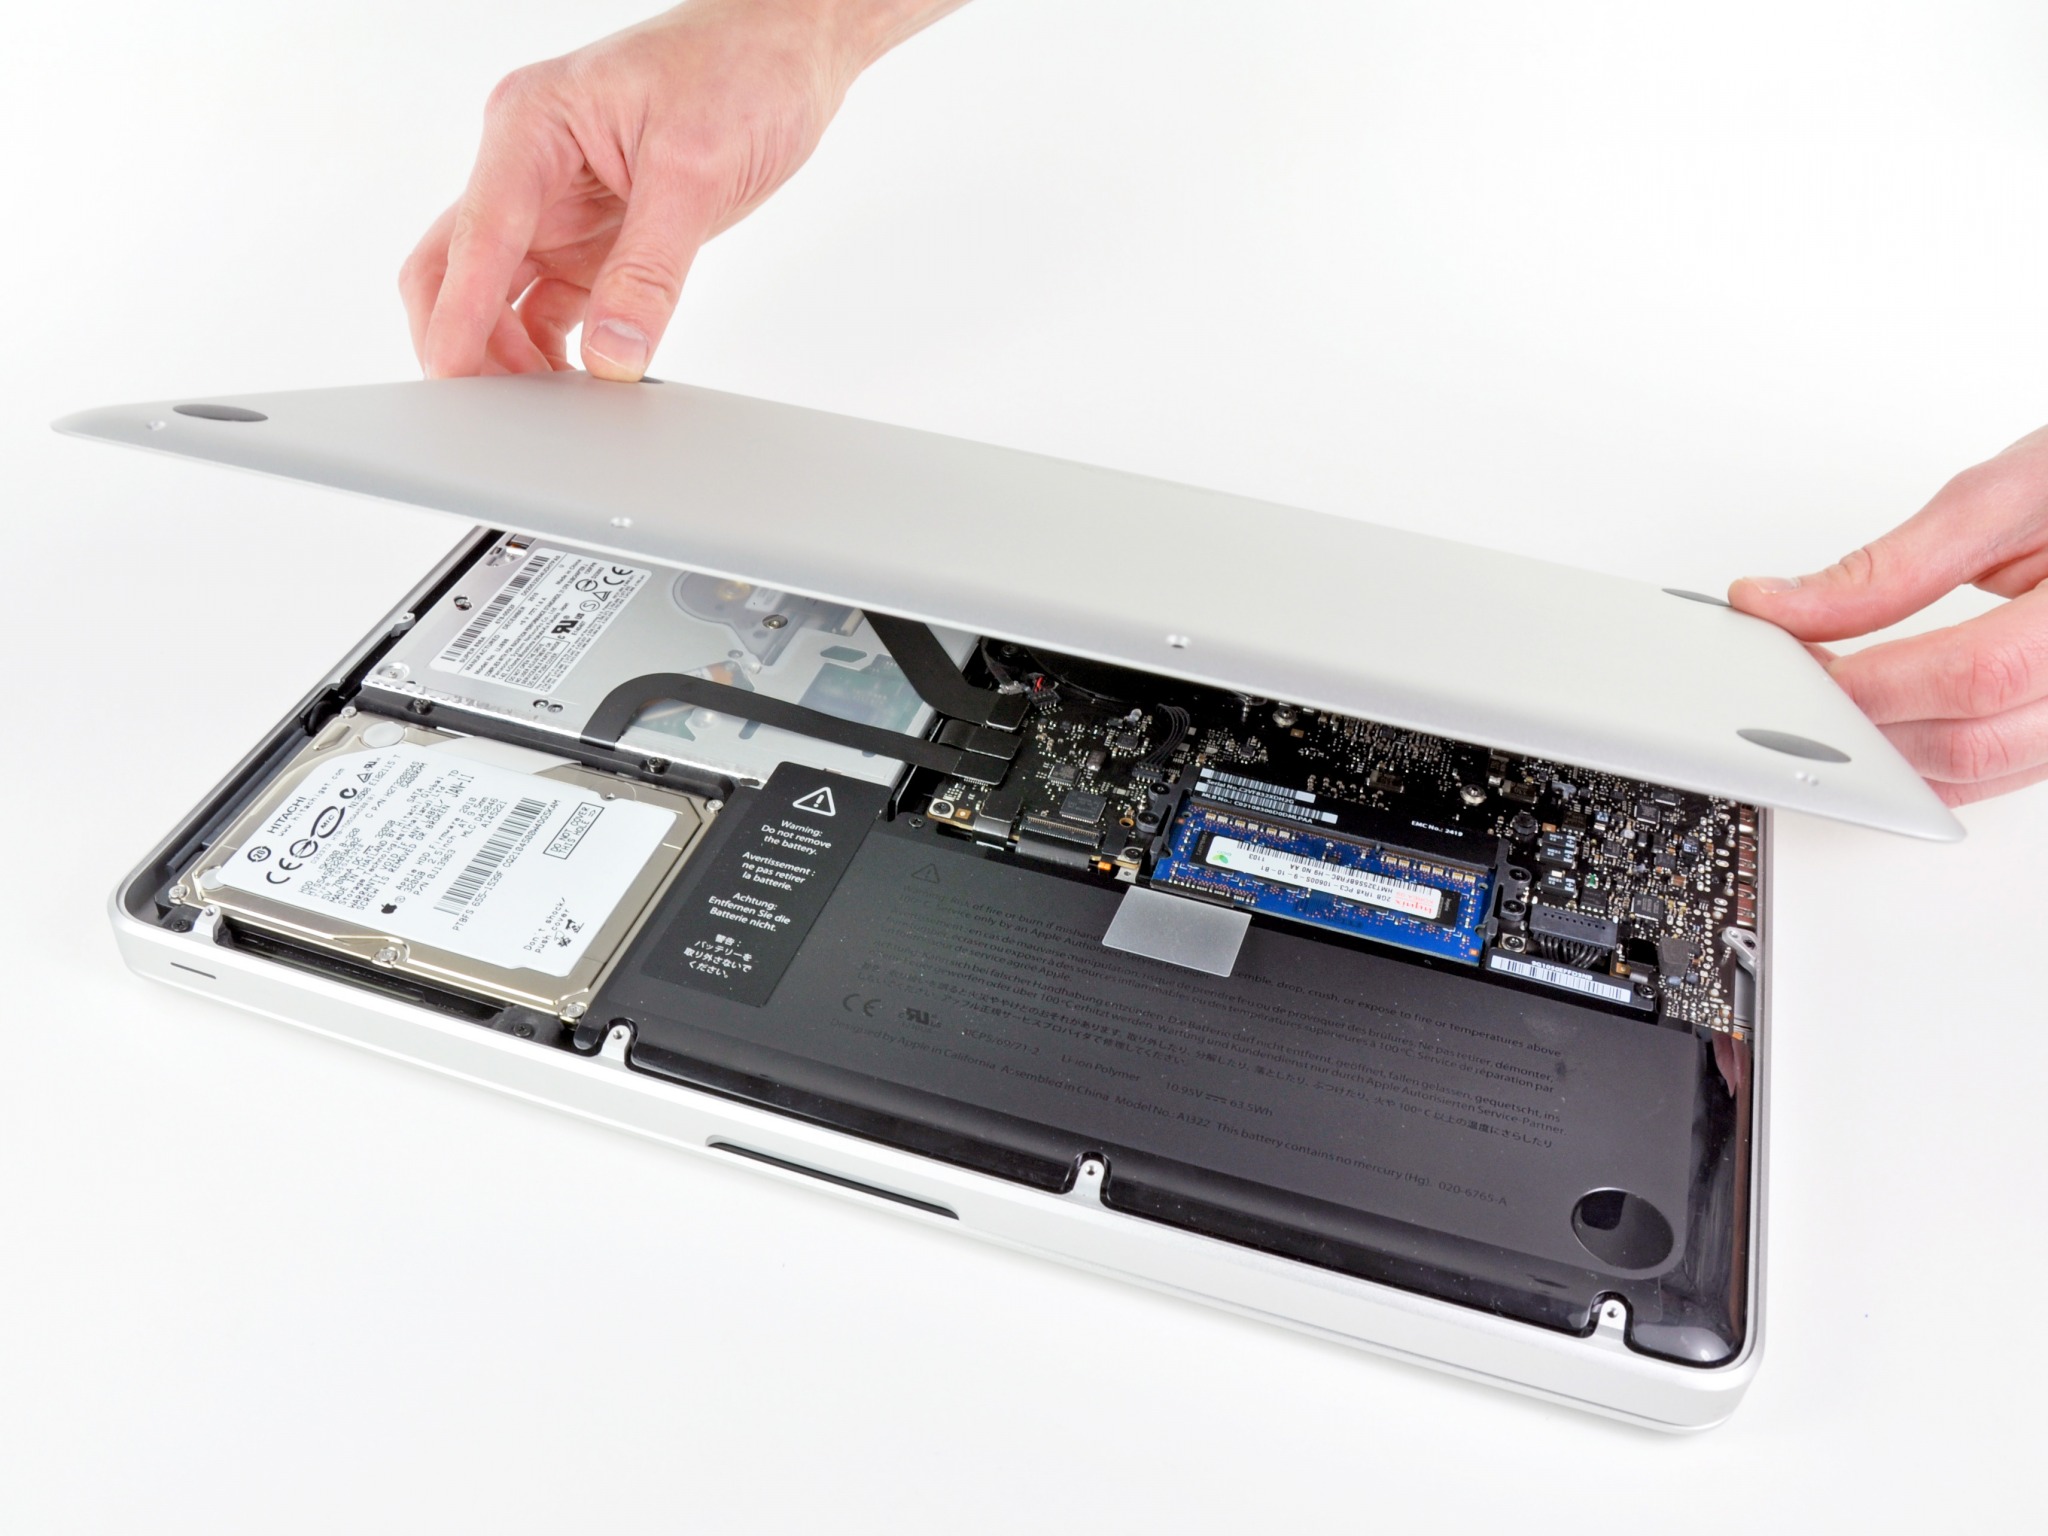
Not 100% sure, therefore, of how to swap it I took the bottom of the Macbook to take a look. To do this, you just need a small Philips screwdriver. Where the drive should be was, instead, a plastic box. At first I thought this was some kind of filler, with the actual SSD being a slot-in model hidden away somewhere. However, looking at the underside of the box I found a model number which, when Googled, showed it to be a 120GB Samsung SSD. So, the guides from iFixit for their general drive replacement will work just as well.
Which Drive to Choose

After much looking I decided on the 500GB Samsung 850 Evo, which costs about £200 at Amazon (see my review here, including a speed comparison with the existing SSD). The 850 is a new model, much quicker than previous models and with a much improved life-span. Yes, it costs a little more but it’s worth it. The Evo is the standard version – a Pro version is also available. I did think of saving money but simply doubling my storage to 240GB, but didn’t want to have problems another year or so down the line and have to upgrade again. 500GB will be more than enough.
If you’re wanting to save money the previous generation 840 will cost about £166 for the same capacity. If you’re happy to avoid Samsung entirely then you can plump for a Crucial 480GB model, which costs £149.
I also enquired at Apple Reseller, KRCS. They will fit a 480GB drive for you, including the following cloning process, for £220. Taking all into account, it’s definitely worth it if you’re worried about following this process yourself.
Yosemite and TRIM
Before we go any further, I need to make mention of an “issue” with Yosemite.
Trim is a feature, build into OS’, that makes better use of SSDs. OS X only supports Trim for their Apple’s own approved drives. However, it can be enabled via third party software, such as Trim Enabler. The problem with Yosemite, though, is a new feature called “kext signing”. This ensures that insecure drivers cannot be installed – any attempt to do so will prevent the Macbook from booting.
What does this mean for you? If you’re using Yosemite and a third-party Trim utility then you’ll have problems. You can read more about it on the Trim Enabler site, including how to switch off kext signing, if you wish.
One of the other advantages of buying a Samsung SSD, then, is that it’s Apple approved (as they provide the existing SSD drives).
What Do I Have Installed?
If you’re going for a clean installation then you’ll need to install your apps again afterwards. If you’re like me, some were download directly, some were from CD and some were from the Apps Store.
One way to get a list of the apps is to click on About This Mac > System Report > Software > Installations. However, this is a rather large list, including all the versions you have installed, etc. Personally, I opened up a Finder window, clicked on Applications. This shows a simpler version of your installations. I re-sized the icons so that everything fitted on the screen and then took a screenshot. Not very hi-tec but it got me a basic list.
Cloning Your Hard Drive
- The easiest way to copy over your old drive is to clone it. To do this you’ll need an external caddy to put the new drive in – this won’t be wasted, though, as you can then put your old drive in this once everything is done – in my case I now have a USB 3 external drive containing a 120GB SSD (making it ideal for throwing in your bag). I bought an Inatek model from Amazon which, apart from being easy to use (no tools required), is optimised for SSD. It cost me £15.99. See the review here.
- Place your new SSD into the external caddy and connect it to your Macbook.
- Open the Disk Utility in the Applications folder.
- Click on the icon for the new drive, and select the Partition tab. Under where it says Partition Layout, select “1 Partition”.
- At the bottom of the window is a box labelled “Options…”. Click on that box, and in the window that opens, select “GUID Partition Table”.
- Give the Partition a name and then select the “Apply” button to format the disk.
- Once that’s done, select Verify Disk, then Repair Disk, just to make sure everything is 100%
- Restart your Macbook. When you hear the startup chime, hold down the Command (?) and R keys.
- When the Apple logo appears, you can release the keys.
- This will load to OS X Utilities screen. Select the option to “Install OS X”.
- Select the new SSD as the destination disk. This process can take upwards of 30 minutes.
- After the OS has installed, the utility will ask you if you’d like to restore files from another disk. If you want a completely clean install, then you can turn this down. Otherwise, select the original hard drive. Depending on how many files you have, this process could take some time, too.
Installing the SSD
- Remove the SSD from the external caddy
- Follow the iFixit instructions, as detailed below, and place the new SSD in the Macbook.
- Turn the notebook back on and it should boot from the newly installed drive.
Leave a Reply to EdanCancel reply