The PS4 Pro comes with a 1TB hard drive. On paper that sounds quite generous but with individual games often taking up 10% or more of this a time, it doesn’t take the avid gamer long to fill this.
Ideally, the best time to replace the drive is before you start using it (i.e. when you first buy the PS4) as all games have to be downloaded and/or re-installed. But that’s the only hard bit of the whole process – Sony have made the procedure very, very simple.
This guide is for the PlayStation 4 Pro but guides are also available for the original PlayStation 4 and PlayStation 4 Slim.
Preparation
There are 3 things you’ll need before proceeding any further…
- A Philips screwdriver
- A new hard drive (what to choose?)
- An external USB drive
The external USB drive should be formatted as FAT32 (how do I do this?). I’ve found that the PS4 will also recognise exFAT (I use that format when saving videos, etc) but have not tested it in Safe Mode – probably best to stick to FAT32.
Getting the System Software
Once the drive is replaced your PS4 will need the system software before it can do anything else.
- Plug the external USB drive that you have into a computer and create a folder named “PS4”. Inside that folder, create another folder named “UPDATE”.
- Download the file from this page, where you see the following image , and place it in the UPDATE folder…
- Ensure the file is named PS4UPDATE.PUP.
I would recommend that you do this in Windows – I did this on a Mac and the PS4 failed to find the file. I set it up again in Windows and it worked. This may have something to do with the file name formatting.
Backing Up
Sadly, the PS4 doesn’t allow you to back up your game installations, only your game saves. If you’re a PSN subscriber (who isn’t?) then this should be automatically backed up to the cloud. Personally, I always believe in absolutely making sure, so I’d also recommend a physical backup as well.
- Connect a USB storage device to your PS4. It should be formatted as FAT32 or exFAT.
- Select [Settings] > [Application Saved Data Management] > [Saved Data in System Storage] > [Copy to USB Storage Device].
- Select a title.
- Press X to select the saved data you want to copy, and then select [Copy].
Replace the Hard Drive
This is the bit that Sony have made really easy.
- Ensure the PS4 is switched off (i.e. not in standby – ensure the light on top is not on at all).
- Unplug the power cable from the back (in fact, it’s probably worth unplugging everything, just to be extra safe).
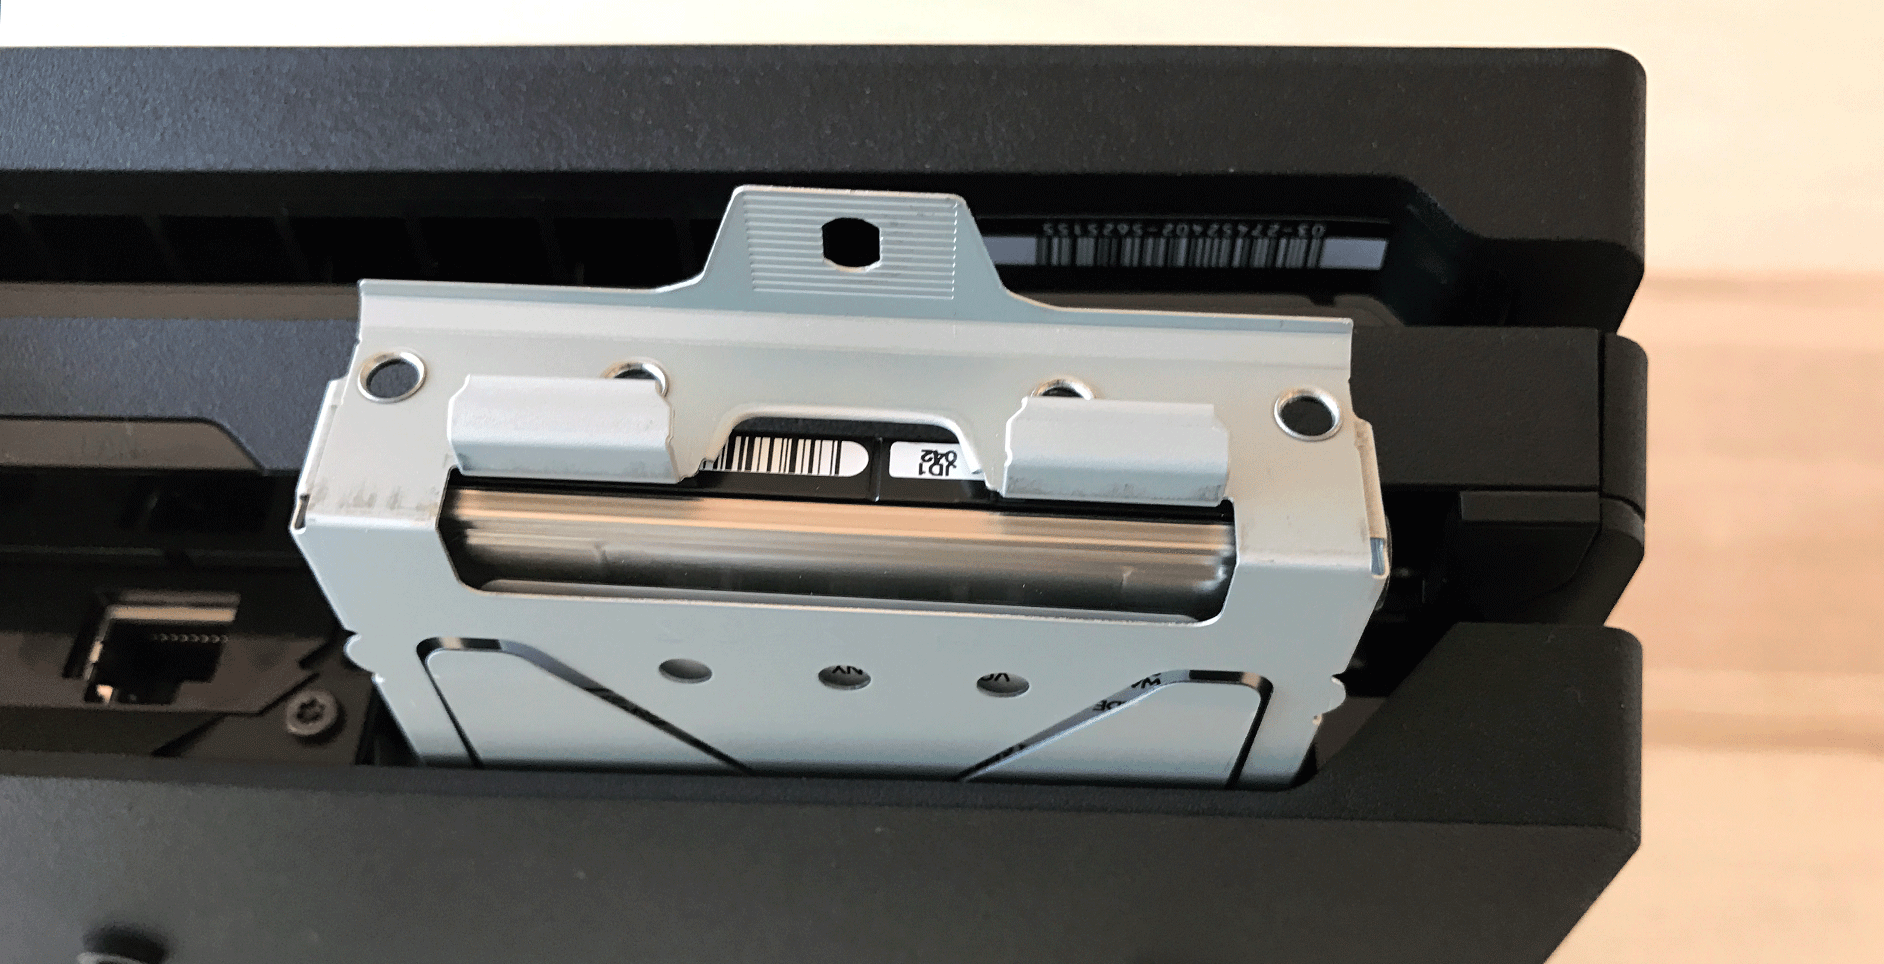
- Place the PS4 upside-down and remove the HDD bay cover. Remove from the right side first (see direction arrow on diagram below). You may see a sticker covering the HDD bay cover. It’s safe to remove this and it will not affect the warranty.
You’ve now removed the old drive, which is held in a special caddy.
- Remove the 4 screws that hold the drive in the caddy (don’t remove the rubber grommets, though, which are on the caddy)
- Take the old hard drive out of the caddy and put the new one in place
To put the new drive in place we simply reverse the above…
- Put the 4 screws back into the caddy
- Slide the caddy back into the PS4 and replace the screw that holds it into place
- Slide the rear cover back
Re-install the System Software
- Ensure all the cables (inc. power) are plugged back in.
- Plug into your PS4 the USB storage device that the update file is saved on.
- Touch the power button until you hear a second beep (this takes about 7 seconds).
- The PS4 system will starts in safe mode.
- Select [Initialize PS4 (Reinstall System Software)].
- Assuming the update file is found it will re-install this.
- Once complete, you will be met with the PS4 set-up screen, where you will need to set everything back up from scratch (settings, sign into PSN, etc).
Restoring Game Save Data
If you stored this on a USB device then…
- Connect a USB storage device to the system.
- Select [Settings] > [Application Saved Data Management] > [Saved Data on USB Storage Device] > [Copy to System Storage].
- Select a title.
- Press X to select the saved data you want to copy, and then select [Copy].
If you have this stored online then…
- Select [Settings] > [Application Saved Data Management] > [Saved Data in Online Storage] > [Download to System Storage].
- Select a title.
- Press X to select the saved data you want to copy, and then select [Copy].
Re-Installing Your Games
The easiest way to do this now is to use the Library – all your games and applications will be listed here and you simply need to select one at a time to start the download process. If you had additional maps, DLCs, etc then these will be listed too and you’ll be given the option to download them all, rather than one at a time.
Update files aren’t initiated here, however, and some will only download once you start the game – indeed, some games don’t fully install until you start them (GTA, BF4, for example), so ensure that you start each.
If the game is on a physical disc then you will need to insert this to install the game. Any extras can still be downloaded, but I’d recommend doing this AFTER the game has been installed from disc.
Talk to me!